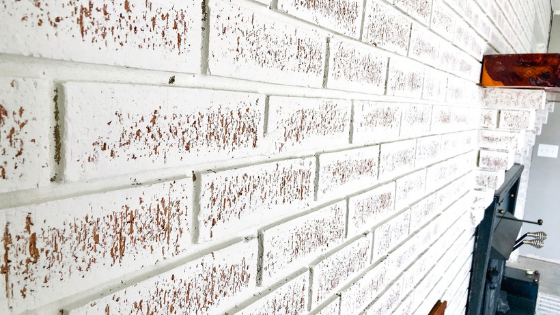
How to Give Your Brick Fireplace a Makeover on a Budget: German Smear Technique
If you have been following along, then you know we are renovating our forever home. It was my Nana’s house (my dad’s mom), so it’s very special to us, especially since my dad grew up in it. We have been remodeling it from top to bottom.
We have had project after project and we are doing most of the work ourselves, so it’s been very time consuming on top of everything else we have going on. While some projects have been not so fun, others like this one have been more exciting.
As soon as we decided we were going to get the house, I immediately started to think about what changes we could make to update the house and make it more “ours.” It’s a brick house that was built in the 1970’s, so you can imagine how much of an update it needed. It was still in good condition, but no one has lived in it for years since my Nana is currently in the nursing home. We would rather remodel it now while no one is in it, as opposed to having to deal with the mess later. We still have a lot of work to do, but we have also made a lot of progress; which brings me to the brick fireplace.
When you walk into the doors from the carport, the same wall is made completely out of brick and also has a fireplace built into it. I knew I wanted to update it, but I wasn’t sure what I wanted, and I was actually nervous about changing it. What if I did a bad job? What if we didn’t like it and couldn’t change it back? It’s hard for me to visualize things when I’m not actually seeing them in front of me.
Here’s a before picture:
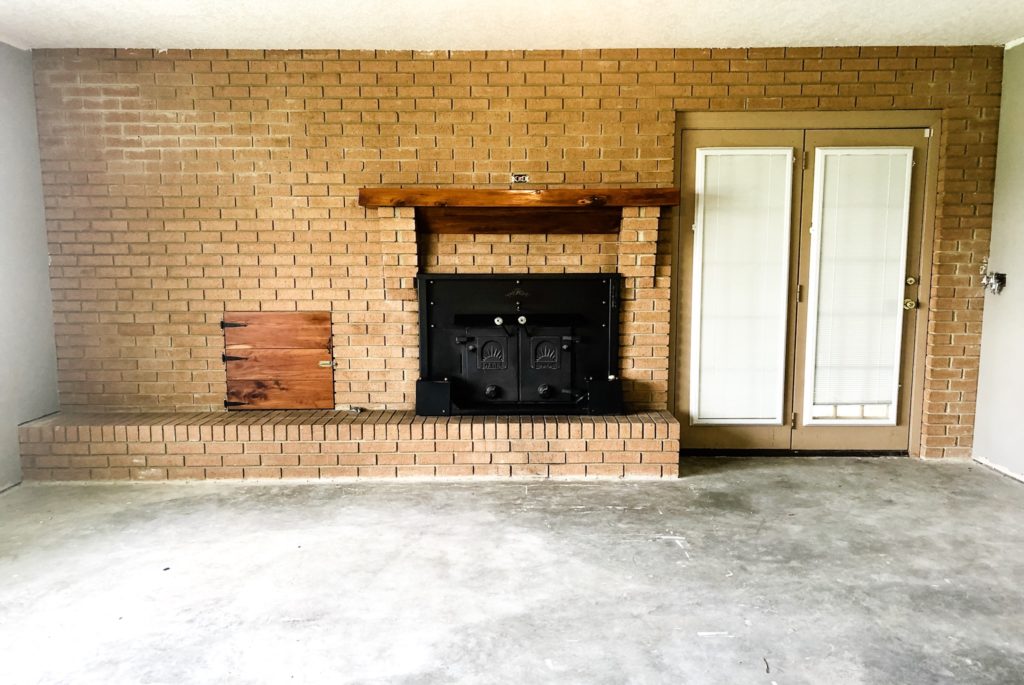
I did some research and decided I was going to whitewash the brick. I had my mind set on that for a few months, and then I came across the German Smear Technique and fell in love.
Whitewashing brick involves using a thinned out paint to cover the brick, while a German Smear (or schmear) uses mortar to cover the brick.
After comparing the two, I decided I would use paint like I would if I was whitewashing the brick (without thinning it out), and I would do it using the German Smear technique. To be honest, a German Smear looks amazing, but I didn’t want to deal with the mortar.
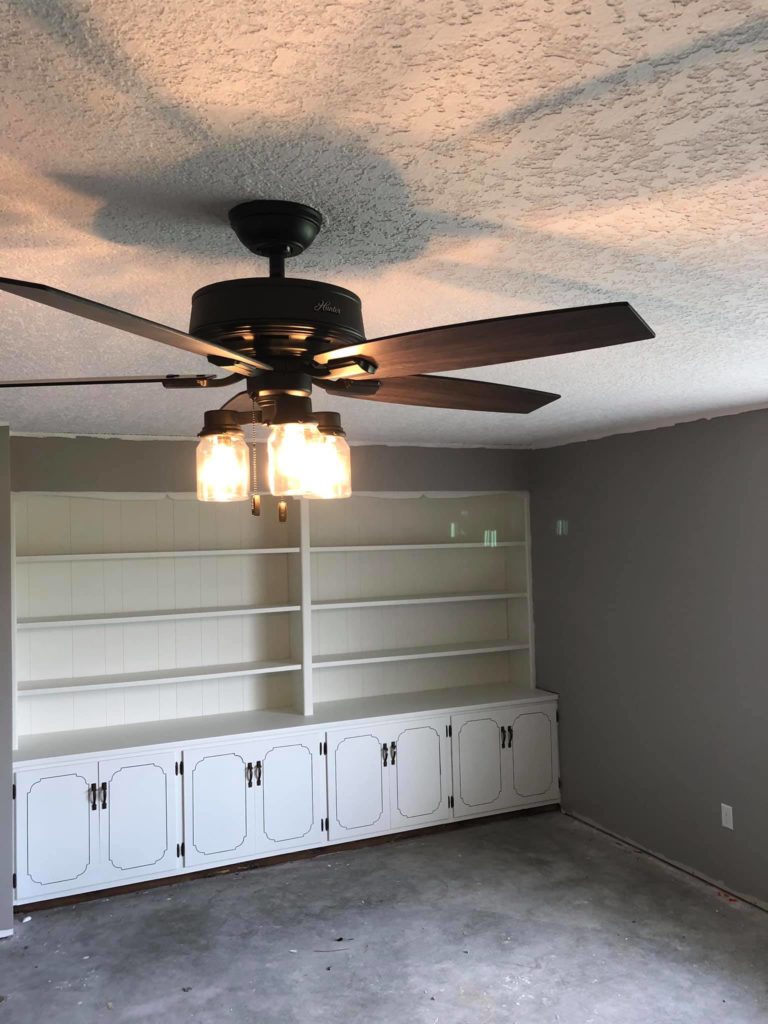
I also wanted it to match our built in book shelf across the room that we painted. I loved the color so much that I decided to use it for several different projects in the house. It’s a white that isn’t too bright, and in my opinion, is the perfect depiction of a “farmhouse white,” which is exactly what I wanted. The color is Alabaster White by Sherwin Williams.
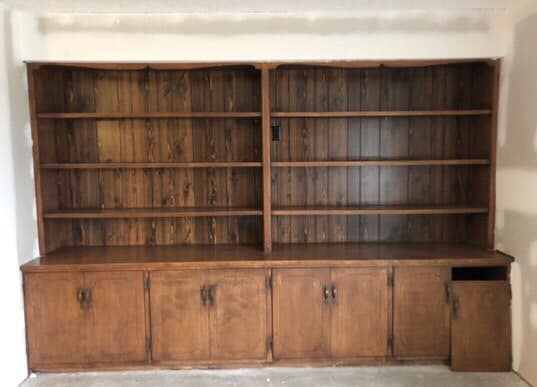
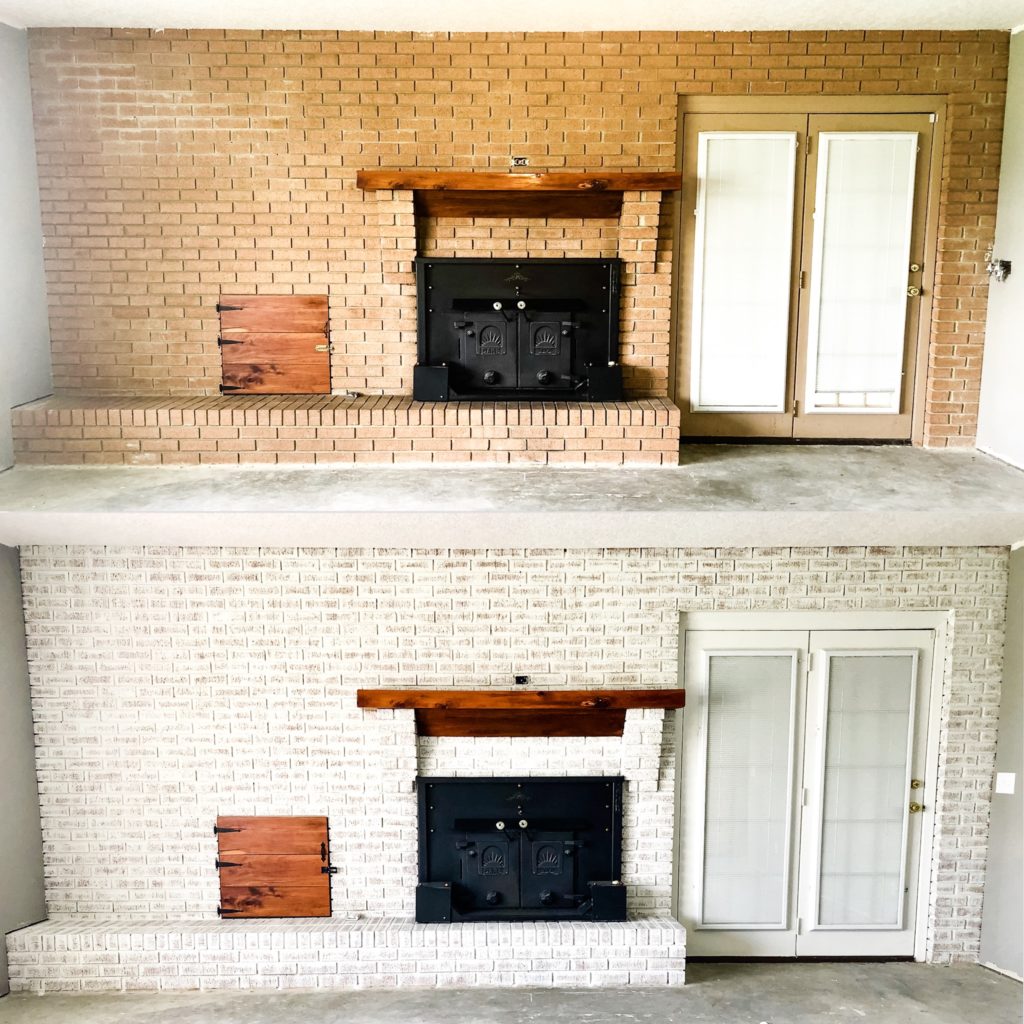
Before 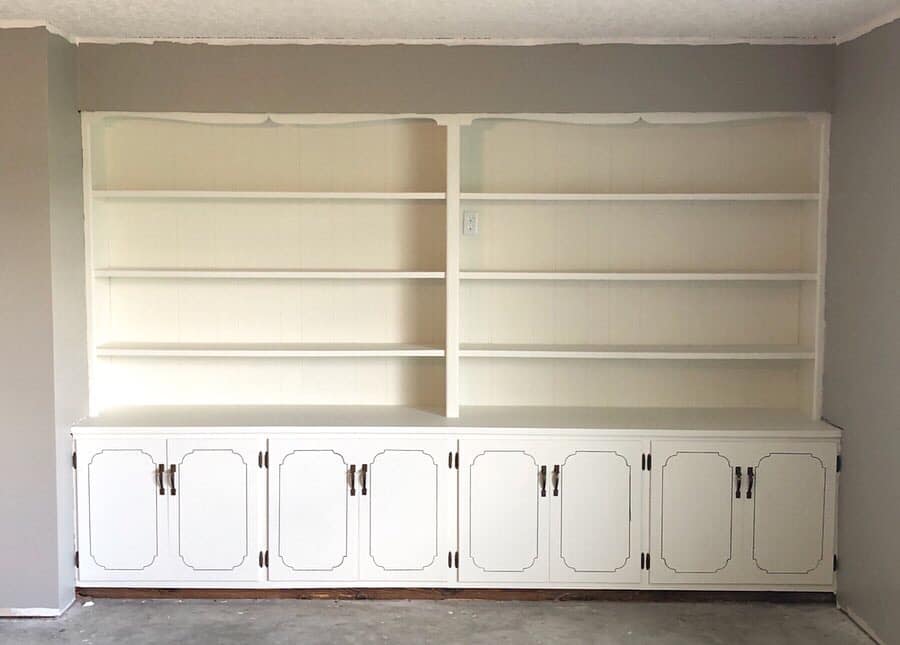
After
I basically combined the two ideas of whitewashing and the German Smear to make life easier, and we are beyond happy with the outcome! It turned out even better than we imagined. I can’t recommend it enough if you are looking for an easy, and budget friendly way to update your brick fireplace. It has a rustic/farmhouse feel to it and just feels like home.
It’s not hard to do. You just need a few supplies and a little time. I wouldn’t hesitate to say that I think anyone could do this and it would turn out great. The beauty of doing it like this, is it doesn’t have to be perfect. You could make a mistake and no one would notice, because it’s not meant to look like a solid, uniform color. The texture of the brick combined with the uneven strokes of paint is what makes it so beautiful.
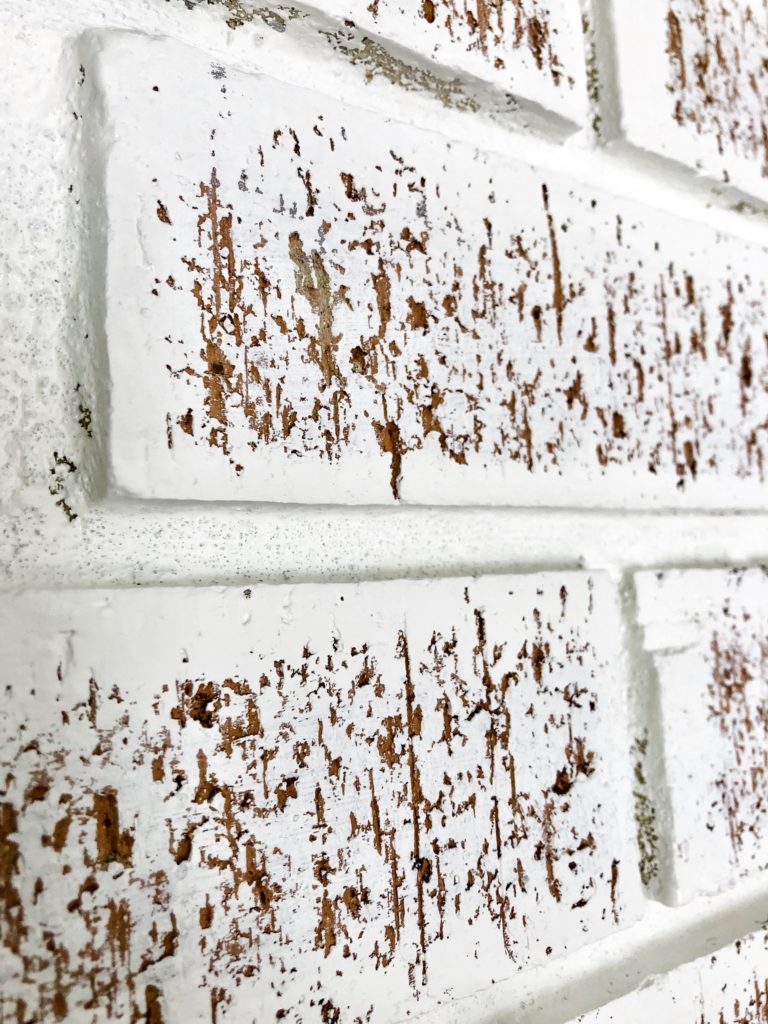
You’d be surprised how much a little bit of paint can completely change the look of something, and it really doesn’t take much to do this makeover.
Things you will need:
- paint brush (I used a 2 inch paint brush)
- paint tape
- plastic/drop cloth
- paint (I used Alabaster White by Sherwin Williams with primer in an eggshell finish)
And, a little of your time, of course. If you have a small or average sized fireplace, you can definitely finish within a few hours. In our house, the entire wall is brick, but with some dedication, I still finished within two days. I didn’t time myself, but if I had to estimate, I’d say it took me about 7 hours to finish. I’m sure I could have finished it in one day if I didn’t have a toddler to see about and didn’t have tendonitis in my wrist. I feel like I still made good timing though, considering…
Not to mention, this project doesn’t break the bank. One of the reasons we are doing most of the work ourselves, is because we are on a budget. Being that it’s an older house, we have a lot of things that need to be replaced and updated, which means more money.
Estimated cost for this project:
- paint brush: $7
- paint tape: $6
- plastic cover: $15
- paint: $20-$38 (quart vs. a gallon)
Total estimated cost: $48-$66
Again, the prices could be more or less depending on what brands/kind of supplies you buy. You can find some of these cheaper. I just found them on Amazon to give you an idea and an estimate of the things you will need. Unless the whole wall in your house is made of brick like ours is, you shouldn’t need as much paint. In that case, for less than $50 and a few hours of your time, you can have a brand new fireplace!
If you’re reading this and thinking there is no way you can do this, you’re wrong! You don’t need to know what you’re doing or be a professional painter or DIY-er to get this done right. I promise. How do I know this? Well…I’m not an expert by any means and I also had no idea what I was doing. I literally started painting while also whispering a prayer that I didn’t mess it up, because I was just winging it, sister (or brother if you’re reading this and you’re a mister and not a sister).
Just follow these easy steps, and you’ll be just fine.
First, you’ll want to clean the brick very well. You don’t want to start painting it when it has spider webs, dirt, dust, and whatever else sitting on it. The best way to do this is to vacuum it off. Get every nook and cranny. We actually vacuumed ours twice just because no one has been living there for a while to take care of anything and it needed the extra love.
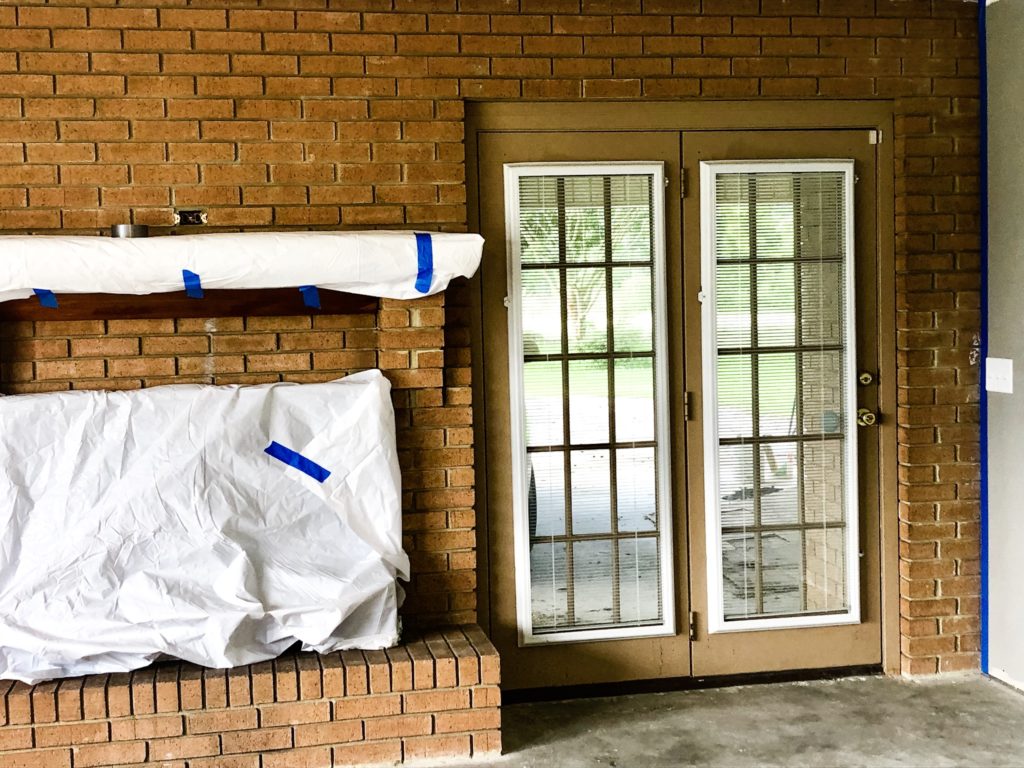
Next, you’ll want to cover anything you don’t want to get paint on with plastic or a drop cloth. For us, it was the mantle and fireplace. We don’t have new floors yet so I didn’t have to worry about that. Obviously, if you are doing this in the home you’re already living in, you’ll want to protect the floor. Also, remove anything that can be removed that you don’t want to get paint on. We have a cabinet door for wood, so we removed that so I wouldn’t have to try and paint around it.
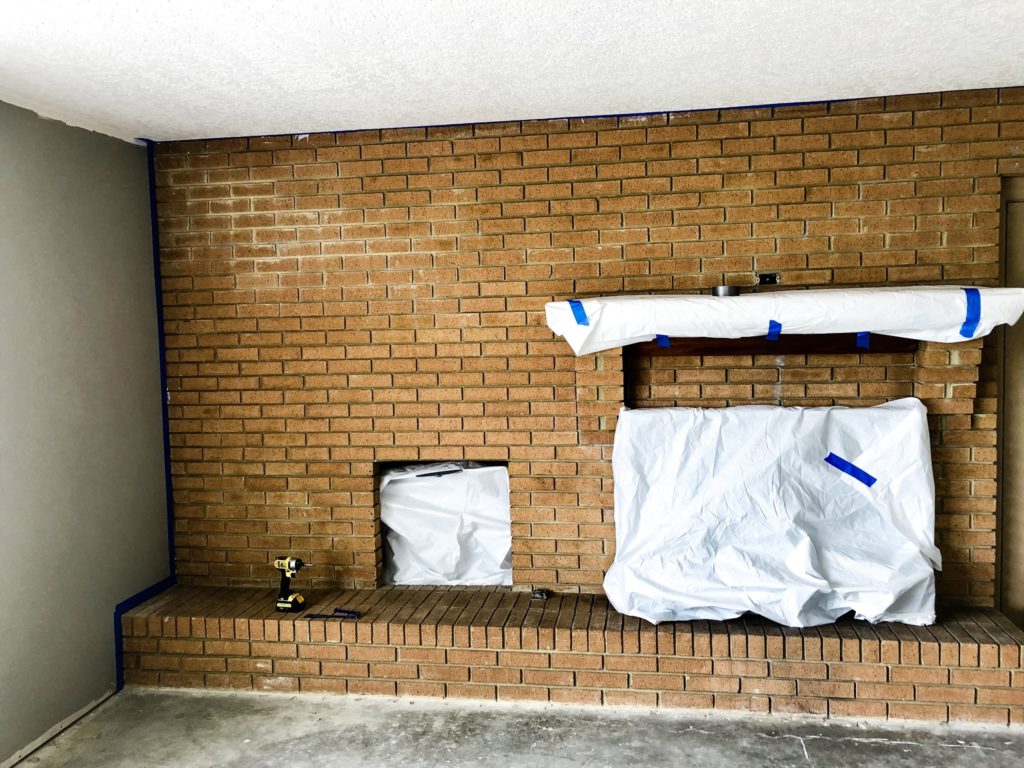
Then you’ll need to use some paint tape to go around the walls, mantle, fireplace, or wherever you need it to go. I didn’t tape around the doors, because I painted those the exact same color to match.
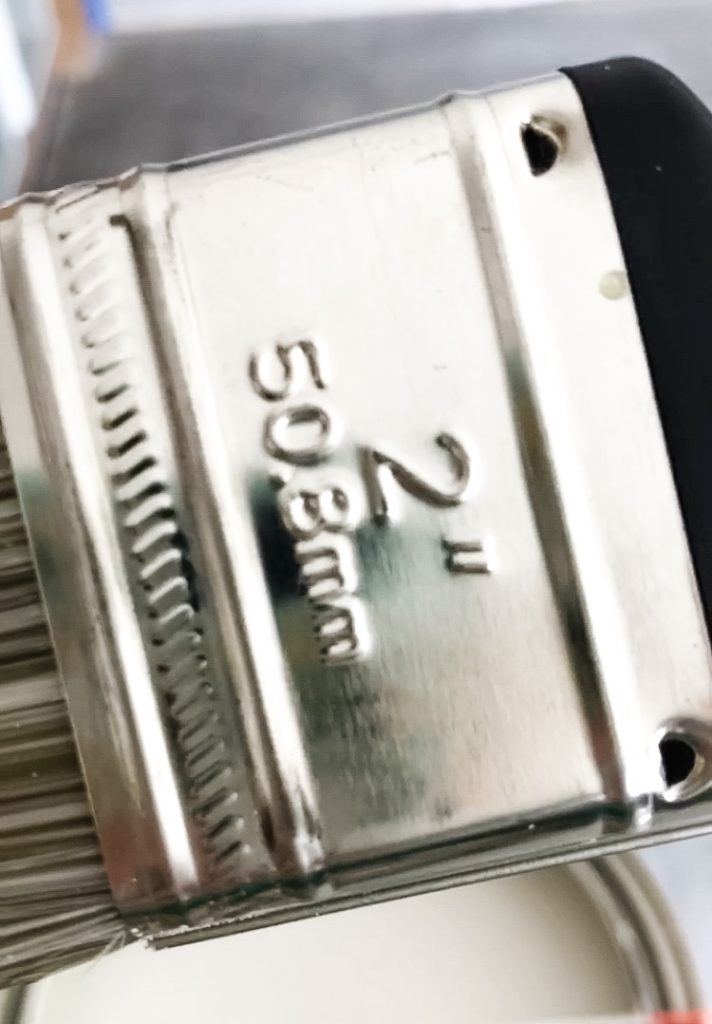
Now you’re ready to start painting. You will need a paint brush that is about the same width as your brick. A 2 inch paint brush worked perfectly for me. I don’t recommend buying an expensive brush, because the brick is rough and will more than likely mess it up by the time you’re done. I also wouldn’t get a super cheap one either. The one I used was somewhere around $7.
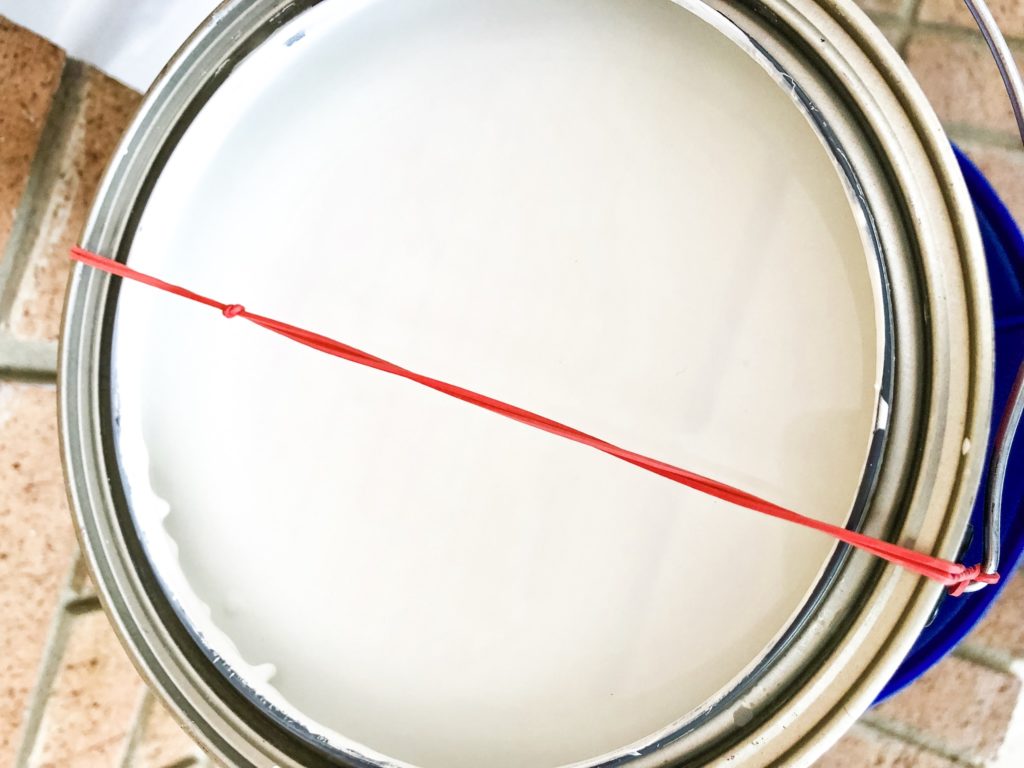
Painting Tip: Spread a rubber band around your paint can so that it’s in the center of your paint can. When you dip your paint brush into the paint, you can use the rubber band to get excess paint off the brush to keep it from dripping. This way you won’t have to use the side of the can which can make a mess, waste paint, and dry around the edges making it hard to put the lid back onto the paint can.

Here comes the fun part. It’s time to paint! I recommend starting at the top and going across, and then working your way down.
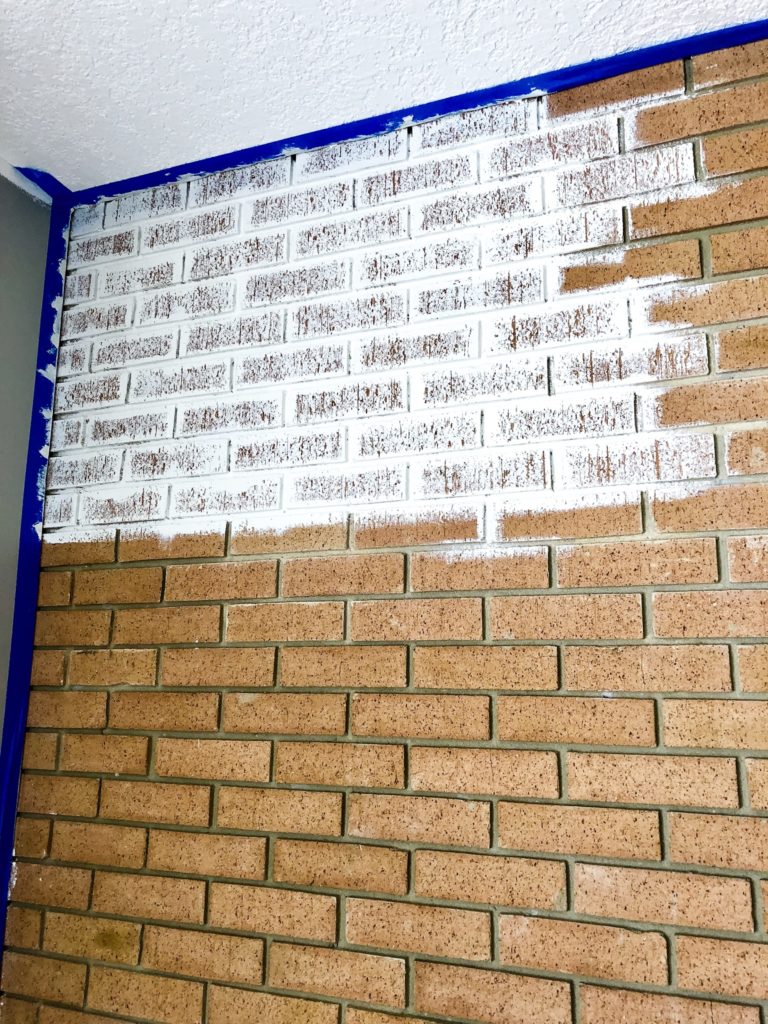
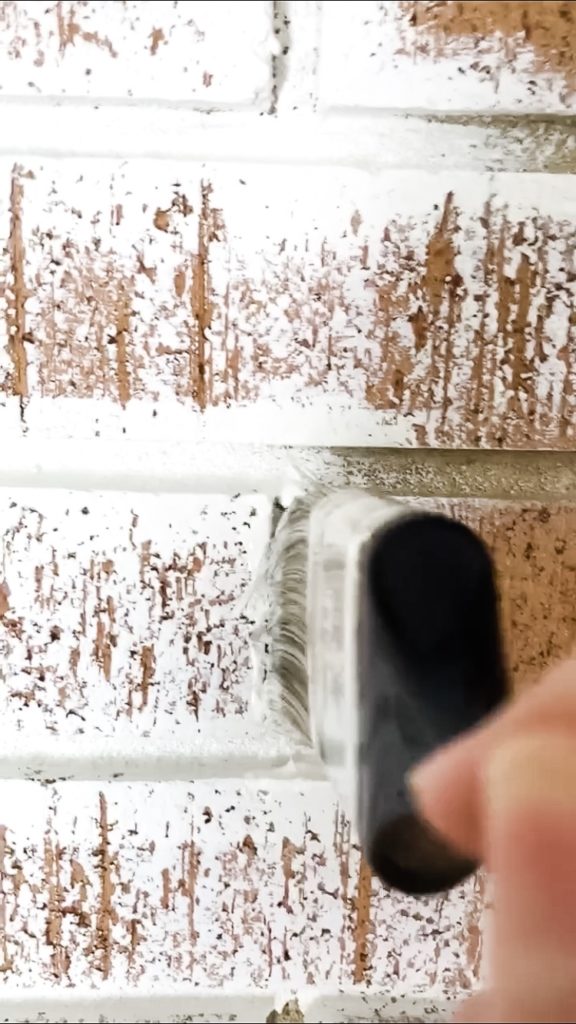
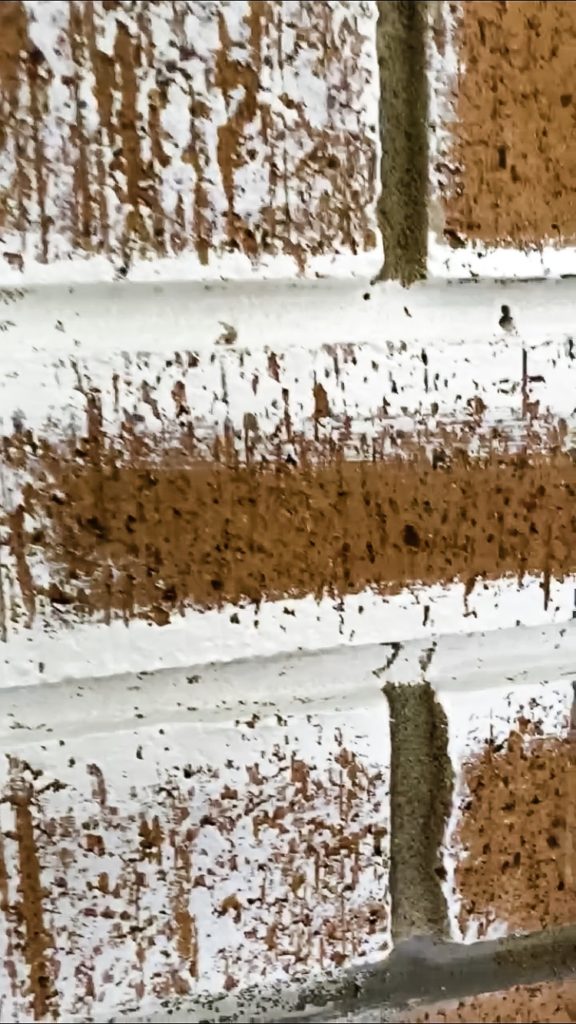
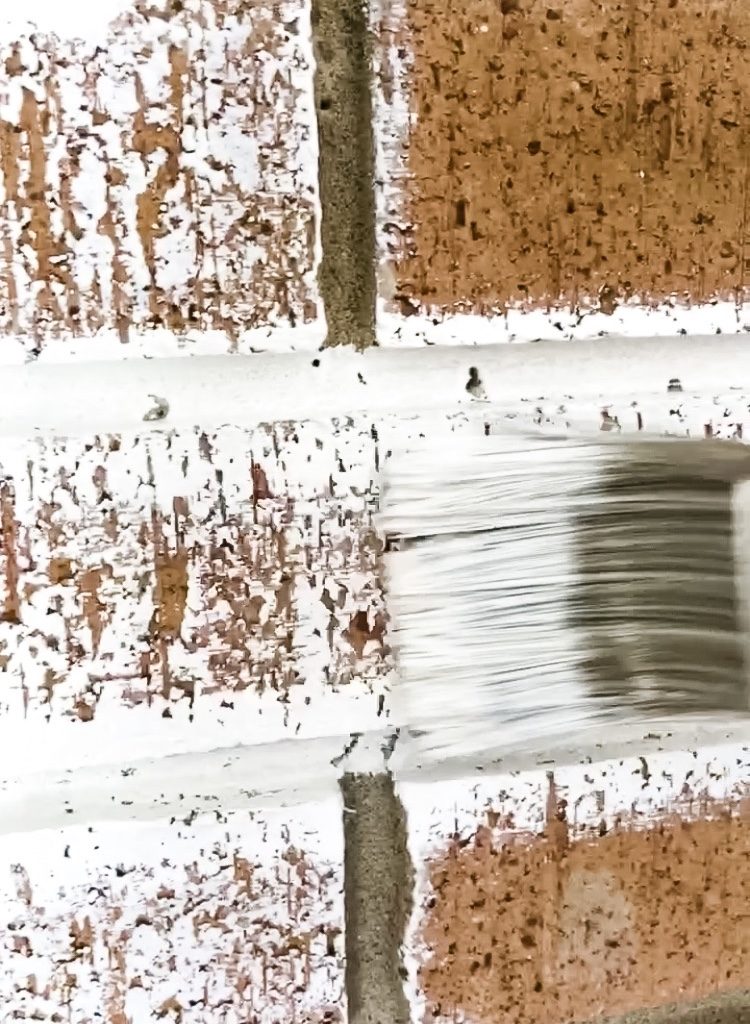
You’ll want to dip just the very tip of your brush into the paint and then heavily coat the mortar/grout around one single brick. You may have to dip your paint brush more than once to do this part.
Once you have gone around the entire brick, take your paint brush (without dipping it into the paint again) and run it across the brick itself to “smear” any leftover paint on your brush across it. You should be able to see the color of the brick still showing through the paint. I ran my paint brush across one direction and then back across one more time to get the coverage I wanted. Again, you don’t need to dip your paint brush back into the paint for this part. I just used whatever paint was left on my brush from going around the edges.
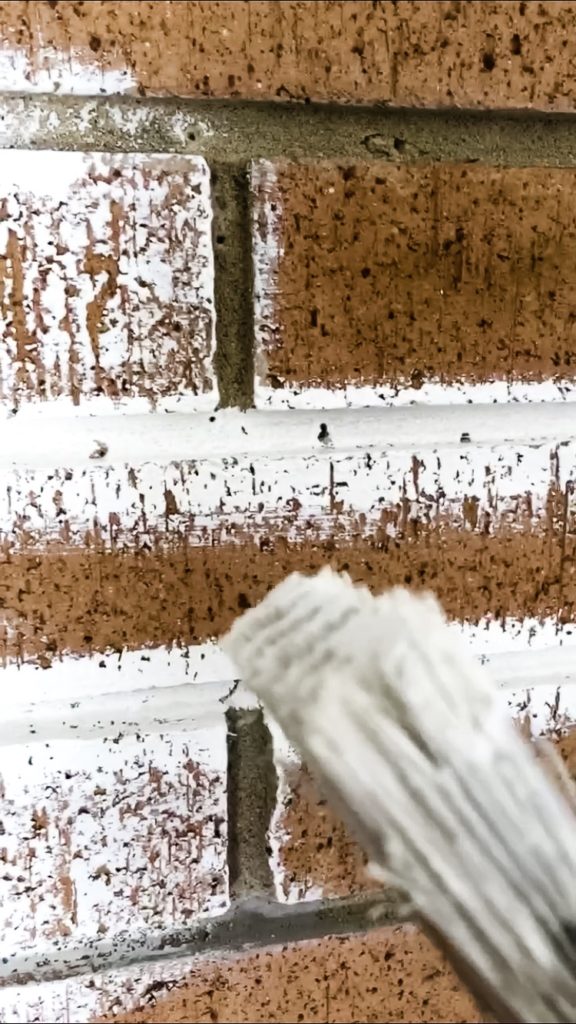
That’s it! Just keep going until all of the bricks are painted.
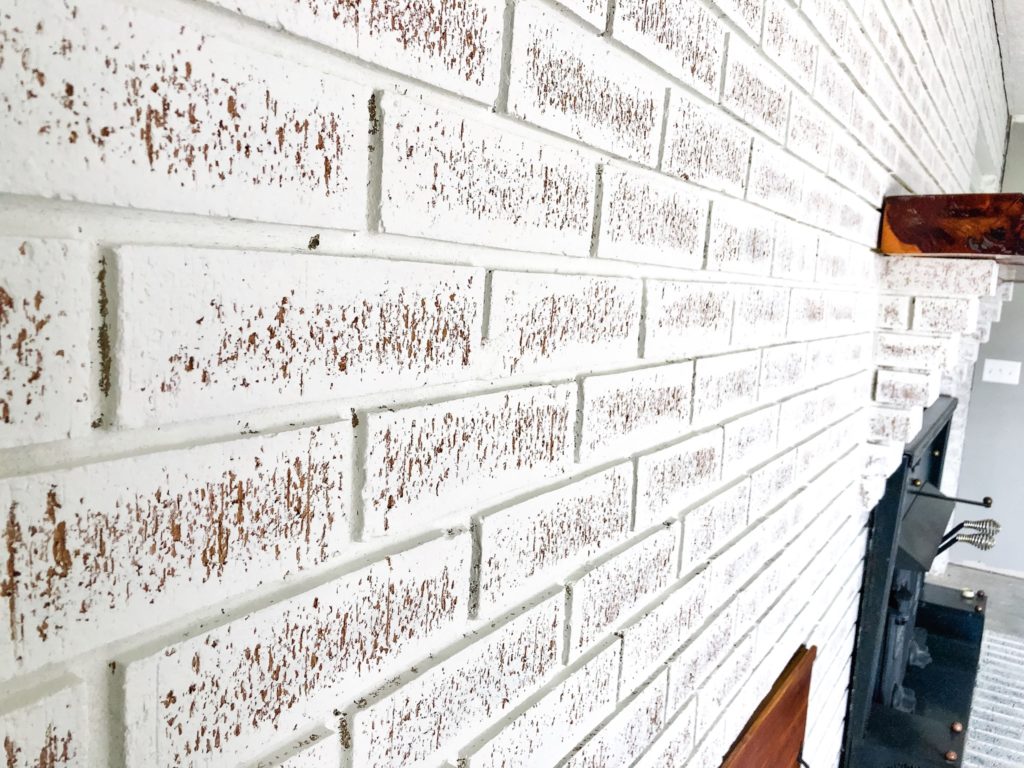
If you finish painting and you don’t like the coverage, you can always go back and do a second coat or touch up the places you would like to. The paint dries very quickly, so if you decide to do another coat, you won’t have to wait to start on it.
It only took one coat for me (thank you Jesus). I had just finished painting our book shelf across the room in the same color, so I got the exact same paint to paint the brick, which had primer in it. I think that had a part in it covering the brick better. Plus, I didn’t want to go back and fill in the gaps too much. I liked the rustic look it had after only one coat and decided to leave it alone.
How much paint you use, will depend on how big your fireplace is, and how much coverage you want. For reference, I used a little over half of a gallon of paint to apply one coat to the entire brick wall/fireplace. Most fireplaces that I have seen are only in the center of the wall or aren’t very big. Ours is from the ceiling to the floor and is across the whole entire wall. More than likely, you won’t need as much paint. If you’re not sure how much paint you need, you can always start with a quart, and go get more if you need to so that you’re not wasting paint and money. I’m using the same paint color for several projects so I went ahead and just got the gallon can.
The finished product:
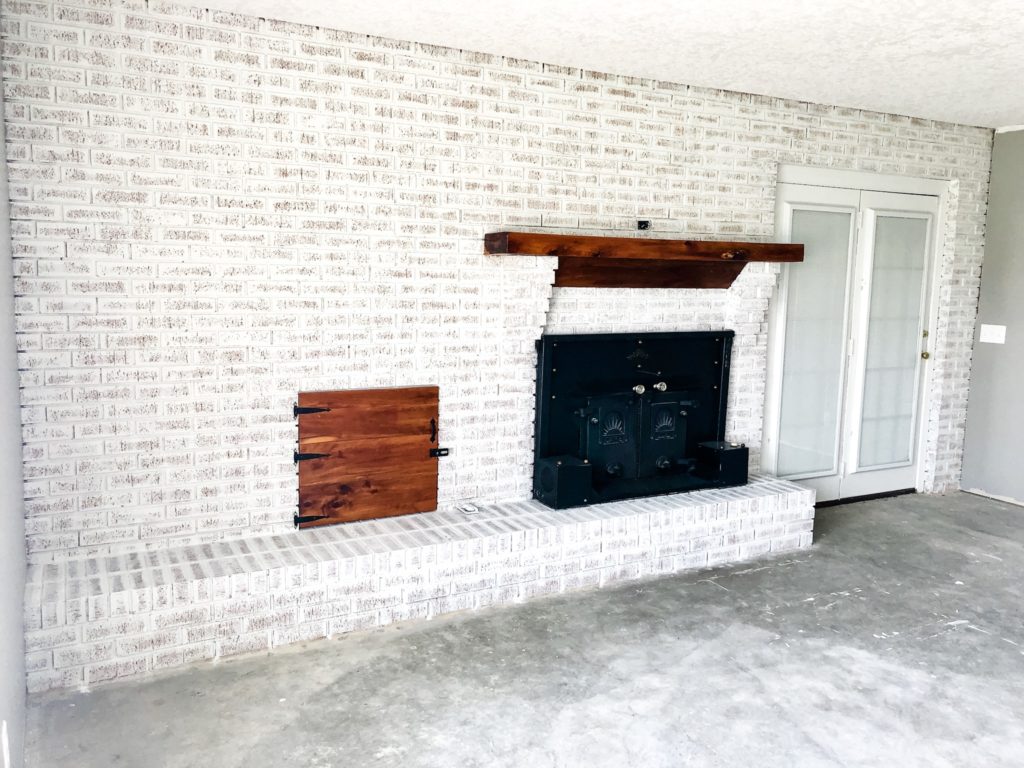
We decided to leave the cabinet for firewood and the mantel as is. For one, we thought the wood really popped with the white, and the brick showing through the paint matches it. Secondly, my Papa built them himself. He’s no longer with us, and in a way, it’s like having a piece of him here with us. I miss him so much.
We were also originally thinking about changing out the fireplace doors to something more modern, but now that it’s painted, we like it with the black doors. It matches everything and gives it an older farmhouse look. If you’re wondering, this really is a farmhouse. My dad and uncle grew up in this house working for my papa on his farm.
There is even a mudroom connected on the other side of our master closet with a shower where they would come in and get cleaned up in. Now Dustin will use it (and I’m sure I will too). I can’t wait to move our farm animals over there. A lot of the farm land was sold, but my aunt and uncle live across the street on part of it, and there are still fields all around the house, so that makes me happy.
Aside from adding a new receptacle/cover above the mantle to match, a new door knob, trim around the edges, and new floors, the fireplace and living room is finished. There was a time when we couldn’t even begin to imagine being this far in the renovation. We can almost see the light at the end of the tunnel. The new floors just got delivered and will hopefully go down within the next few weeks sometime when we are ready for them. We still have some small odd and end things to do before starting on those.
Here are the Before and After photos so that you can compare how the fireplace looks more closely to see what a huge difference this has really made.
Dustin has been laughing at me, because I am so excited to decorate this for Christmas this year. It’s my favorite time of year. That’s not the only reason I’m excited about Christmas time. I have so many memories of sitting in front of this fireplace as we opened presents at Christmas time with my Nana. Now we get to do the same thing with Austin, and that makes it even more special to me. We are hoping to be moved in by this November at the latest. We still have so much work to do, but we are getting there!
If you’re planning on using this method to update your fireplace, I’d love to hear from you in the comments below. If you have any questions at all, don’t hesitate to ask! Like I said before, I am not a professional, but I’d love to help in any way that I can.
***Disclaimer: The claims reflected in this post may not be your exact outcome due to the size of your fireplace, amount of paint needed, technique used, and amount of time it takes to paint due to certain circumstances. Please keep this in mind when taking on this project. Faith Fun Food is not responsible for any unwanted outcomes due to following these steps for this particular technique. This is just our own personal experience in updating our brick fireplace in our home.***



6 Comments
Lisa
It’s beautiful! So special!
Brittany
Thank you! It really is special!!
Debra
I LOVE it! Nana, would, too! You have got to give the only Aunt you have close by a tour! P.S. Are the pecan trees producing this year? I am super happy my sisters Granddaughter will carry on her family tradition!
Brittany
Thank you!!! You are welcome to come see it anytime. I haven’t paid much attention to the pecan trees since we have been so busy with the inside, but I did glance up in one of them the other night and saw quite a few.
Heather R
I love it! I’ve been thinking about doing something similar to my fireplace. Ours is an entire wall like yours. Thanks for the tips and technique!
Brittany
Thanks so much, Heather! It was a lot easier than I thought it would be and I enjoyed working on it. You’re welcome! I hope this helps for when you’re ready to paint your fireplace!